Gold leaf application: more details
Gold leaf application, whether for oil- or water-gilding, whether using loose-leaf gold or transfer sheets, requires several stages of work:
- preparing the background surface
- laying down a special medium ('mordant') for the gold leaf to adhere to
- making sure the mordant's surface is 'primed' -- sticky enough to receive the gold, not so sticky that the gold disappears into it
- applying one layer of gold leaf, pressing it on
- letting it dry
- usually, polishing ('burnishing') the first layer
- usually, applying further layers of gold leaf ... repeat as necessary ...
- touching up edges, corners, rough patches etc (a stage that may take some time)
- final burnishing for brilliance
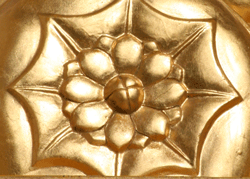
- optionally, tooling (texturing) the gold
So make sure you allow enough time for RELAXED gold-leaf application if you are planning a piece to a deadline :-)
Gold leaf application: water-gilding, or oil-gilding?
Water-gilding is gilding in which the gold leaf adheres to a water-based mordant, made sticky with a thin layer of moisture (usually, from the gilder's breath). In oil-gilding, the gold adheres to an oil-based mordant which dries at a controlled rate, so you can put the gold leaf on when it's a tacky texture and then leave it to dry the rest of the way.
As mentioned elsewhere on this site, gold leaf application onto paper media, calfskin, etc is nearly always achieved using water-gilding. For gold leaf application onto signboards, walls etc, oil-gilding is more suitable.
Oil gilding is NOT suitable for use on paper media because the oily adhesive soaks in and will ruin your writing surface. Equally, water-gilding doesn't give a durable enough surface for outdoor or highly exposed work. So, make sure you obtain the correct gilding media for your chosen piece of work before starting.
Loose leaf gold
Loose leaf gold is often a little less expensive than transfer gold, but it makes up for this by being a lot fiddlier. Hence, no photo of a loose leaf fluttering in the breeze. (I'm working on it.)
Traditionally, loose gold leaf application requires extra kit: most importantly, a gilder's tip (special wide brush for picking up the loose leaves by one edge). If you're gilding small areas at a time, you may also want a gilder's cushion (for resting a leaf of gold on while you cut it up) and a gilder's knife (for cutting the gold into neat pieces while it rests upon the gilder's cushion). Loose gold leaf is astonishingly flighty, fragile, folds up into itself on a whim, and sticks like the very devil to all things it is not supposed to. Hence the special pieces of equipment for handling it. But all these things cost money.
Personally I find that for gilding small areas you can get away with using a sable paintbrush (size 4 or larger) wiped across your nose or forehead to pick up a little oil, which makes the bristles just adhesive enough to catch up an edge or corner of a gold leaf. By carefully holding down the rest of the gold leaf using one of the non-stick chalked pages which it arrives in (not your fingers), you can tear pieces off the leaf using the paintbrush, and then lift them onto the spot where they're going to be stuck.
It is crude, but it is a very economical method of gold leaf application and, as mentioned above, it works for small areas.
If you are handling a whole leaf of gold at a time, and especially for gilding larger areas, you really are best off using a gilder's tip. This soft wide flat brush 'holds on' to one edge of an entire gold leaf, enabling you to pick it up reasonably securely and position it easily on the work.
When handling loose gold leaf:
- make sure your hands are scrupulously clean and, especially, free of oil or other stickinesses
- have all your equipment laid out and the work to be gilded readybefore you open the pack of gold
- have a piece of the gold-leaf manufacturer's chalked tissue or glassine sheet handy, for pressing the gold onto the work, picking it up if it falls, etc
- minimise draughts (including your own breath)
- move slowly and cultivate infinite patience :-P
Transfer gold (backing-sheet gold leaf)
Transfer gold comes on backing sheets of thin tissue paper which allow it to be cut up easily and handled like paper. However, transfer gold sometimes lacks the willing 'stickability' of loose gold leaf, and it can be harder to get it into corners for fine detail and raised work.
It sometimes costs slightly more than loose gold but for easy gold leaf application and especially for flat gilding it's well worth the extra and of course you may see it as a considerable saving not to have to invest in the gilder's tip, cushion, etc.
I've also seen it written that transfer gold doesn't take quite the same shine as loose leaf. Possibly not (it's hard to tell). However, transfer gold adds shine to one's confidence by making results more easily obtainable, so I do recommend it for beginning gilders, calligraphers in a hurry, or for gilding small or fiddly flat areas etc.
Transfer-gold-leaf application is relatively simple. Try to handle it only by the tissue edges so you don't get oil, moisture etc from your fingers onto the gold. Hold it firmly in place and press it down well, using a burnisher if necessary to get it into the corners of the work. Remember that it may not stick so well as loose gold, so you might need to apply a second layer.
I will put together step-by-step instructions for water-gilding and oil-gilding as soon as I can get suitable illustrative pictures!
Go back to 'Gold Leafing' for more information and links
Return from 'Gold Leaf Application' to the Calligraphy Skills homepage